
|
Ski Equipment |
||||||||||||||||||||
|
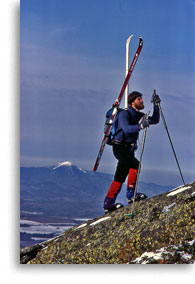
In the Adirondacks, thick trees on steep slopes are common, and when our objective involves this type of terrain we use snowshoes. But when open slides, trails and glades with well-spaced trees are on the menu, we’ll choose skis with a smile every time because skiing, when it’s good, is one of life’s great joys! We provide packs and accessories for use during our ski programs – or bring your own if you prefer. You need to provide appropriate ski equipment (skis, boots and poles), clothing, and personal accessories. For overnight trips, we provide all group gear such as tents, stoves, cook sets and emergency equipment; you will need to provide your own sleeping bag, pad and pack. In some mountain environments, clothing can be as important to your safety as a rope. Please visit our Equipment page for an in-depth discussion of technical clothing. Included are topics on: heat and moisture management, outdoor fabrics, fit considerations for clothing and footwear, purchasing suggestions, and much more. If you are not very familiar with specialized outdoor clothing we suggest you carefully review this page. |
|
|||||||||||||||||||
In the section below, we have tried to give you a range of choices to help guide you in the acquisition of equipment and specialized clothing. There is no one “best way” to outfit yourself and cost will inevitably enter into your purchase decisions. Our opinions regarding equipment and clothing for any given purpose are based upon our experience using the equipment extensively in the Adirondacks. When we travel away from this area our choices are sometimes different. If you have questions, please do not hesitate to contact us. Equipment & Clothing Lists Clothing For Backcountry Skiing APPROPRIATE CLOTHING IS ESSENTIAL FOR YOUR COMFORT & SAFETY!!! Wicking Layer Insulating Layer Because skiing is a stop-and-go activity, you will be adding and subtracting layers fairly frequently. Many people find a light fleece pullover or a soft shell is all that is required over a wicking layer during active skiing. A down (or synthetic) jacket is great for warmth during lunch and at other inactive times. An extra fleece layer, stuffed into your pack, provides more options for comfort as conditions and activity change. Outer Layer (Shell) |
||||||||||||||||||||
|
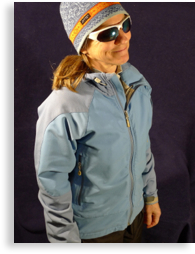
SOFT SHELLS: We usually wear soft shell tops and pants over a wicking layer when skiing. Most of the time these comfortable, and very breathable, garments are sufficient on their own as outer layers. They do a great job of protecting against wind, snow, and light rain, but they are neither water “proof” nor wind “proof”. When it’s really nasty we will, reluctantly, wear our hard shells over our soft shells to keep the elements at bay. Many companies manufacture soft shells and several fabrics are now used in addition to the original one made by Schoeller. These garments are available in light and heavy weights. For skiing, we find the lighter weights to be more versatile. Hoods are nice for extra warmth but not required. Soft shells offer a big improvement over other outer layer options but get ready for sticker shock – comfort comes at a price.
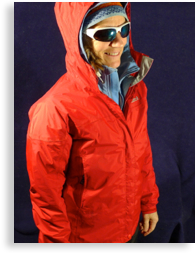
HARD SHELLS: These will protect you under the harshest conditions. We use hard shells only when we must but we carry them in our packs most of the time just in case we need to wear them over our soft shells. There are many waterproof-breathable, hard shell garments on the market and most work quite well. We like the lighter weight fabrics for skiing. We prefer an anorak (pullover with a built-in hood) on top and pants (not bibs) on the bottom. Jackets and bibs are satisfactory but may be less comfortable for skiing. Side zips are a convenient feature on pants, but not required. Coated, or non-coated, nylon jackets and pants are passable substitutes if you need to save a significant amount of money. A ski jacket and pants will also work as a last resort. |
|
|||||||||||||||||||
|
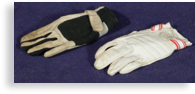
Head and Hands When you are actively skiing, a light to medium weight ski glove will usually keep your hands warm while providing good dexterity. In colder conditions a heavy ski glove will provide the required additional warmth. Mittens, although warm, can compromise dexterity to the point where skiing becomes awkward because you can’t control your ski poles effectively. To be functional in really cold conditions, gloves need to be large enough so they can become a makeshift temporary mitten to warm your fingers – without removing them. This is accomplished by sliding your fingers back into the palm area of the glove and forming a fist so your fingers can warm each other. Gloves need to be large enough so you can do this without difficulty. Insulation technology is less important to warmth than the ability to ball your fingers up and warm them. We rely exclusively on gloves for skiing but carry spares in our pack. We usually have extra light/medium gloves and a really warm modular ice climbing/ski glove in our packs. |
|
|||||||||||||||||||
Personal Accessories Substitutions |
||||||||||||||||||||
|
Equipment For Backcountry Skiing If, on the other hand, you are considering one of our more advanced programs be sure your equipment is adequate; the wrong equipment can make it difficult or impossible to learn. In either case, please call us if you have equipment concerns – we’d be happy to help you sort things out. Along with the information below, you might also wish to look at “Skiing Evolution and Terminology”. We prepared this document to help skiers understand where modern skiing technology came from, to help them maintain sight of the big picture, and to remind them that, even though it may not seem so, it’s all really just skiing! More importantly, understanding how the sport of skiing has evolved may lead you in new directions with the evolution of your own skiing. More options, more fun! Locating a good selection of equipment can be quite a challenge in some areas and internet purchases only make sense if you know exactly what you want and fit is not critical. Fitting ski boots requires careful comparison of different boot sizes and models until the best fit becomes apparent. Without a well-stocked inventory of boots at hand this is not possible. Poorly fitted ski boots always make skiing less pleasant than it should be. Call us if you are unsure about your equipment needs or where to find what you want. There is no one single set of equipment that can meet all the needs of every backcountry skier. In the information below, we have tried to provide a range of choices to help guide you in the acquisition of equipment. If you already own some equipment, you may find it’s adequate to get you started. Rentals and demos are a great way to find out if you like a particular ski or boot before you buy, and many shops will apply demo fees toward a purchase. In any event, don’t rush right out and spend a lot of money on gear until you are fairly sure how you expect to use it. Also, be aware that beyond technology, ski equipment is sold based upon fashion, sex appeal and a whole lot of other factors that will not help one bit with your skiing! There’s nothing wrong with looking good, just don’t let it get in the way of choices that will help you ski well. We encourage you to seek the advice of a knowledgeable salesperson. Take this list with you and you should be able to get most of what you need at a well-equipped ski shop. All of the equipment listed is available in our area if you are unable to obtain it elsewhere. |
||||||||||||||||||||
| Backountry Ski Equipment – The Big Picture Backcountry Skiing Equipment Choices Backountry Ski Boots Backcountry Skis Ski Equipment Rentals Suggested Reading |
|
|||||||||||||||||||
| . | Backcountry Skiing Equipment – The Big Picture Over the years we have been fortunate to ski it all (well, most of it anyway)! We’ve skied everything from 120cm to 220cm; waxable, waxless; single and double cambered; fat, thin and everything in between; soft, stiff; and we’ve skied it in all sorts of conditions; forwards, backwards; and on one ski or both. Then there are the bindings and boots... RL’s current ski “quiver” includes more than a dozen pairs of skis and six pairs of boots! NOBODY needs this much equipment! Here’s the good news: ski equipment of all types keeps improving and the choices available today are much better than what was available 20 years ago. The bad news is that the choices are myriad, often confusing, and sometimes rather insignificant, despite claims to the contrary. If you listen to the manufacturers and retailers you might end up owning a dozen pairs of skis but that would be a mistake. Even so, get ready to be a bit confused and to spend some money on these new toys. What’s a skier to do? Most folks getting into backcountry skiing need to decide between a nordic (free-heel) system and an alpine touring (fixed heel for descents) system. If you are already a skilled (advanced or expert) alpine (downhill) skier, an alpine touring (AT) setup may make sense for you. This is especially true if you aspire to get into ski mountaineering where most of your focus will be on steep ascents and descents. On the other hand, if you are relatively new to skiing, if you are already an experienced nordic skier or, if your aspirations are more focused on gentler objectives, you will likely be better served with nordic gear. Neither alpine nor nordic is better, they just do different things better. Backyard skiers have very different needs from those seeking wild, big mountain snow. Some serious backcountry skiers own both nordic and alpine touring equipment but many do fine with just one or the other. If you are unsure, we suggest going with a nordic setup because it is more versatile. That said, nordic gear requires better technique, skill, and tactics on terrain near the limit of your ability. And, if you have knee problems, alpine touring gear can allow you to ski where nordic gear might prove problematic. The telemark turn is not much fun when your knees are screaming in discomfort. Older and injured skiers take heed. Again, rolling and gentle terrain is ideal for nordic gear. Steep terrain calls out for alpine touring gear. If you aspire to complete a Haute Route in the Alps, alpine touring gear will likely serve you better. If you expect to ski gentler terrain, nordic will be your best bet. One solution to the equipment dilemma is to own an alpine touring setup plus a nordic setup (maybe two). This allows skiing over a wide range of terrain and conditions without trying to stretch gear beyond its limits. Serious backcountry skiers often go this route eventually. |
|||||||||||||||||||
Backcountry Equipment Choices |
||||||||||||||||||||
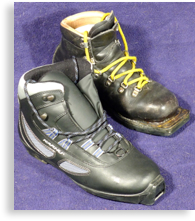
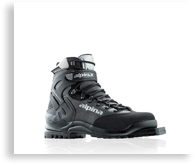
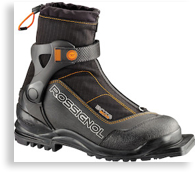
Backcountry Ski Boots Fitting Boots Once you have decided on the type of boot you need (see below) you should try boots from at least two different companies to get a sense for how boot shapes can vary. You’ll be amazed at the differences. We wear the same thickness and type of sock in all of our winter footwear, so fit is not altered by the “wrong” sock – and we never add socks to adjust fit. Fitting ski boots can be a challenge. Boots that are too tight will be cold because they will limit blood circulation in your feet. Boots that are too loose will flop around and ski poorly – and may cause blisters. The ‘size’ of the boot is just the tip of the iceberg. You need to find a boot that is the right SIZE, but more importantly it must also fit the SHAPE of your foot. Feet have multiple dimensions and boots need to fit them all. Heel-lift and pressure points are indicative of a bad fit, as are boots that are too wide or narrow. Sometimes insoles can be used to adjust fit effectively but once you get a good fit you should not have to mess with it again. Don’t settle for a poor fit! Expect to spend a minimum of one hour fitting boots, much longer if your foot shape is at all challenging. A skilled ski boot fitter can provide invaluable advice and solutions to fit problems. Unfortunately, many sales people simply do not have the expertise or experience required to do a good job so be careful who you choose. There are no ‘best’ boot brands! Don't be swayed by gimmicks, personal opinions or even price; buy the boot that fits the best. You’ll be glad you did when your feet are warm and comfortable five miles from the nearest road. Avoid the temptation to go with a lighter nordic boot because it’s easier to fit and feels better in the store. Nordic boots that are too light will impair your ability to control your skis in the backcountry. It’s better to err on the heavy side when it comes to nordic backcountry ski boots. On the other hand, with alpine touring boots for the backcountry, it’s better to err on the light side. |
||||||||||||||||||||
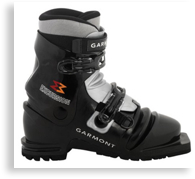
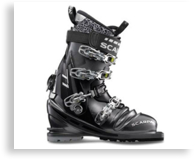
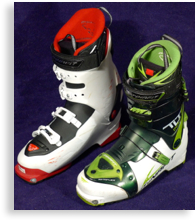
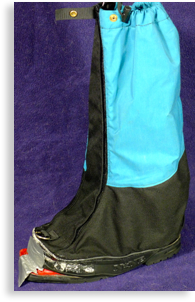
Lightweight Backcountry Nordic Boots Other light boot and binding combinations, including the lightweight SNS and NNN systems, can be used on gentle backcountry terrain but they have very significant limitations and they will leave you wanting when downhill control is essential. Keep this much lighter equipment for quick trips to the local ski touring center, park or golf course. Mid-weight Backcountry Nordic Boots Nowadays many skiers select 75mm, nordic norm 3-pin boots from companies such as Alpina, Black Diamond, Crispi, Fischer, Garmont, Rossignol or Scarpa. There is quite a range within this category and the lighter end of this range is great for less aggressive backcountry objectives. If you intend to do some lift-serviced skiing, or you expect to ski difficult slopes or conditions in the backcountry, we suggest you purchase boots at the heavier end of this range. We, and a whole lot of other backcountry enthusiasts, ski on Garmont’s Excursion boot most of the time although the Scarpa T4 is comparable if it fits your foot better. These are warm, supportive, two-buckle plastic boots that will control most skis in most conditions. They are on the heavy end of this category but, if they fit well, most skiers find them comfortable even on long tours. If you ski mountainous terrain, these may be the only nordic backcountry boots you need. Heavyweight Backcountry/Telemarking Nordic Boots Lightweight Alpine Touring (AT) Boots The featherweight, two-buckle, Dynafit TLT5 Mountain has a super-comfortable walk mode, skis beautifully and is our current favorite in this category. Paired with Dynafit bindings and light skis it is a dream come true! Heavyweight Alpine Touring (AT) Boots The four-buckle Dynafit Titan is on the light end of this category but it offers all the support we need for any type of skiing. Gaiters |
|
|||||||||||||||||||
|
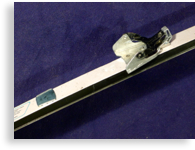
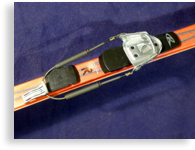
Backcountry Ski Bindings |
||||||||||||||||||||
|
Lightweight Nordic Bindings Mid-weight Nordic Bindings Heavyweight Nordic Bindings Lightweight Alpine Touring (AT) Bindings Heavyweight Alpine Touring (AT) Bindings |
|
|||||||||||||||||||
Mounting Bindings |
||||||||||||||||||||
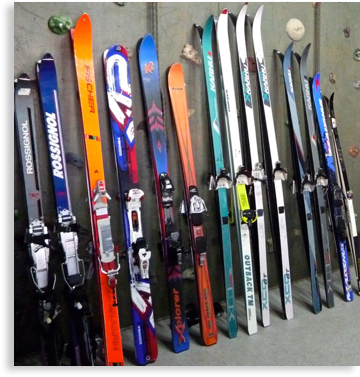
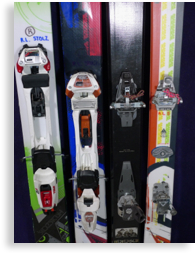
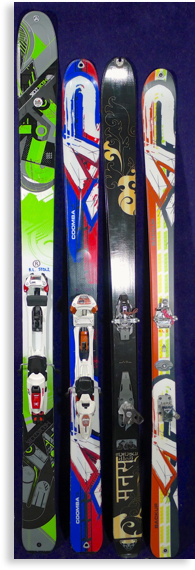
Backcountry Skis Although they’re fine for touring centers and golf courses we find very little reason to buy any ski without full metal edges for the backcountry. Edges are a real asset in the difficult conditions encountered in the backcountry (especially in the East where ice is common) and we consider them essential. Waxing is usually simple and skiing on a wax base is more efficient than on a waxless base in cold conditions, but climate change means we are skiing in warmer conditions more often every season. Waxless skis make sense more often than they once did. Owning a pair of waxable and a pair of waxless skis is ideal but if you have to pick just one, waxless is probably your best choice. This was not our advice several years ago but a string of warm winters, along with improvements in waxless skis have changed our thinking. Nowadays, most of the better backcountry skis are waxless although good waxable skis can still be found. Lightweight Nordic Backcountry Skis Representative skis from this category include Madshus’s Glitterand, Fischer’s E99 Crown, Alpina’s Red Tail and Rossignol’s BC 65/70. Mid-weight Nordic Backcountry Skis Representative skis from lighter end of this category include Madshus’s Eon (formerly the legendary Karhu XCD-GT), Fischer’s S-Bound 78/88, Alpina’s Odyssey Edge, Rossignol’s BC 90. Skis from this heavier end of this category include Madshus’s Epoch (formerly the Karhu 10th Mountain Tour), Fischer’s S-Bound 98 ,Alpina’s Lite Terrain, and Rossignol’s BC 110. Heavyweight Nordic Backcountry Skis Representative skis from this category include Madshus’s Annum (formerly the Karhu Guide), Fischer’s S-Bound 112, Alpina’s X Terrain, Rossignol’s BC 125, and Voilé’s Vector. Alpine Touring (AT) Skis Lightweight Alpine Touring (AT) Skis Skis from this category are becoming very popular and most alpine ski companies have at least one or two models. Our favorites include Dynafit’s Manaslu for softer snow, and K2’s Backup for spring/all-around snow. Both ski beautifully. Heavyweight Alpine Touring (AT) Skis This category is where much of the latest, cutting-edge ski design is taking place and it has exploded in popularity. K2’s Coomback is a great, all-around ski on the lighter end of this category. Skied on the short side, they turn on a dime and will handle almost any conditions. The K2 Sidestash is a joy in any kind of deep snow, especially if you like to ski ‘in’ the snow rather than ‘on’ it. |
|
|||||||||||||||||||
|
Sizing Skis Although we use equipment from all of the above categories, if you are like most people, one set of skis is already too expensive! If this is the case we suggest you just start with a nordic setup from our mid-weight category. Equipment in this range is about as close to all-around as you will find and it has a place in every skier’s collection. Many backcountry skiers have moved to fatter skis and, if you expect to ski challenging terrain and conditions, this makes sense but there is still a place for an all around ski like the Madshus Eon or Epoch in every backcountry skier’s arsenal. Of course you could just buy a setup from each category above. Go ahead, sell your car – and your house! Skis are clearly more important! Or maybe not. |
||||||||||||||||||||
|
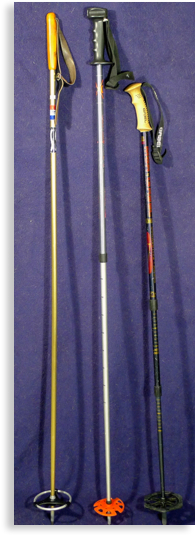
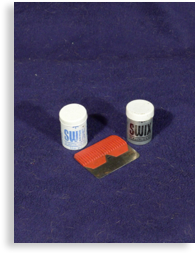
Ski Poles Wax and Skins Keep in mind that all skis benefit from glide wax, even waxless ones. When skiers refer to ‘waxable’ skis they are actually referring to skis that require ‘kick wax’, as opposed to waxless skis which achieve kick with a patterned base. When the climbing gets too steep for wax (or waxless bases) to hold, climbing skins are the answer. Skins are needed for all of our ski programs except Backcountry Basics. Strap-on skins are annoying at best so limit your choices to the glue-on models and don’t bother with kicker skins – they are almost useless. Don’t cut your skins short as suggested in some information sources. Make sure you get tail attachments for a solid system that will not come undone.
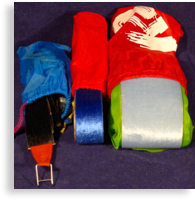
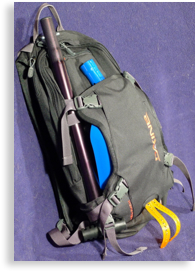
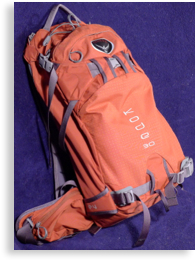
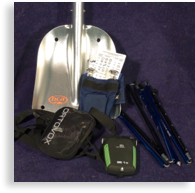
Ski Pack Ski Helmet Avalanche Equipment A shovel, avalanche probe and avalanche beacon are essential tools in avalanche areas. An inflatable flotation pack and/or an Avalung may also be worth considering. We carry avalanche gear whenever there is a real threat of avalanche, which usually means on slides, steeps and other locations when there is a chance of unstable snow. Carrying avalanche gear on most gentle valley tours where there is virtually no risk of avalanche in any snow conditions loads you down unnecessarily. On the other hand, not carrying that same gear on slopes where avalanche hazards do exist is foolhardy. Too often, the decision to carry avalanche gear is guided either by wishful thinking or hubris rather than an informed understanding of things. If there is no chance of an avalanche you do not accumulate brownie points by carrying a shovel, probe and beacon! You just schlepp useless weight. If you do not know if there is an avalanche hazard, find out before you go! Don’t assume that $500 worth of the latest gear will somehow make you safe. It won’t. If there is a serious hazard, carrying avalanche gear is NOT the right course of action. Not going there at all is the smart choice. On the other hand, if you enter avalanche terrain without the right gear you will not be able to effectively assist an avalanche victim so, no matter how lucky you feel, carry the gear and know how to use it if there is a chance it might be needed. Our introductory backcountry skiing programs do not normally enter avalanche prone areas so there’s no need to carry avalanche gear. Our alpine touring, advanced nordic and climbing programs occasionally enter potential avalanche areas but before that happens we will spend plenty of time discussing the risks and make sure we have appropriate gear. In stable snow conditions the risks are usually negligible but in the kind of conditions that make this stuff fun they may be greater. Forthright discussions are the only way to decide if the risks are worthwhile. There are two huge problems when it comes to avalanches. First, the science used to evaluate the snowpack is not precise and even experts can’t forecast accurately. Forecasts usually involve a greater margin for error than people think, despite efforts by forecaster to explain this. And just because it’s safe over here does not mean it will be safe over there, even if ‘over there’ is just ten feet away! The vast majority of people have only a vague notion of how avalanches work and what they can do. The second, and in many ways the bigger problem with avalanches, lies in the ‘grey zone’ where there is some hazard but the snowpack is not obviously unstable. Nobody sensible will intentionally enter an area with a high risk of avalanche but the lure of fresh powder is a legitimate justification for skiers to take some risk. Unfortunately, people get excited and increase their willingness to take risk in the face of a fabulous run in fresh snow. The already limited objectivity and margin for error of snowpack evaluation gets nudged closer to risks we might not accept were it not for the promise of something really special. Our emotions influence our rational selves. Sometimes it’s hard to accept what we’re getting ourselves into. Moderate to considerable avalanche danger is usually the trickiest because the risks are not extreme but they are still there to some degree and, without obvious consequences, it’s easy to rationalize decisions. Frank, consequence-aware discussion and analysis are the best tools for making these decisions. |
|
|||||||||||||||||||
Ski Equipment Rentals Rental equipment is available in our area however, demand can be high during busy periods so advance reservations are required (allow at least two weeks). Rarely, people reserve rental equipment, expecting to have what they need, and then find boots don’t fit, skis are not what they expected or the gear they reserved was not returned and thus not available. Because these types of concerns can not be quickly solved, and because equipment plays such an important role in skiing, we suggest you avoid relying on appropriate rentals being available if possible. If you have equipment concerns of any type please call us so we can help you sort things out well in advance. Suggested Reading We maintain a small selection of books available for sale, including this one. One of the more interesting of the many backcountry skiing websites is WildSnow.com. Several informative movies can be viewed at ORS Cross Country Skis Direct. These movies compare various backcountry boots, bindings and skis. |
||||||||||||||||||||


|
~ Mountain Adventures In the Adirondacks Since 1985 ~ |
|||
|
Alpine Adventures, Inc. |
(518) 576-9881 |
||